In this scenario, you will learn how to customize the MM01 screen with the required fields to create a material. You will see the simplified screen after adding various screen elements in to single screen. Follow below steps to customize create material screen:
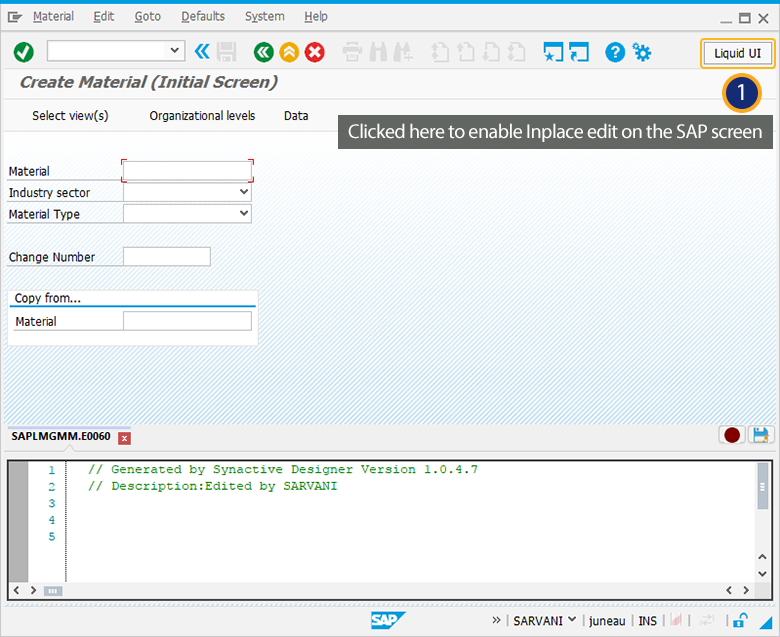
- Navigate to Create Material screen(MM01) and then activate Liquid UI Inplace Edit.
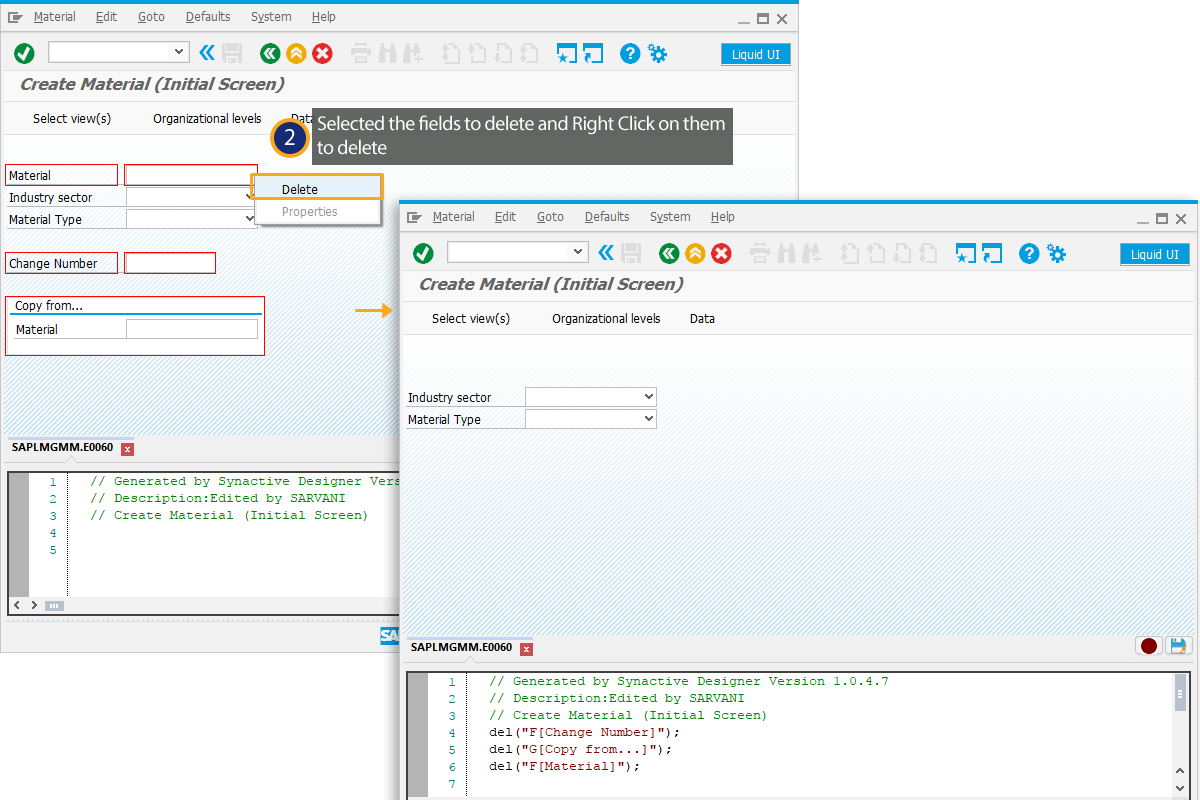
- Select the fields to delete on the MM01 transaction and then Right Click on it to delete.
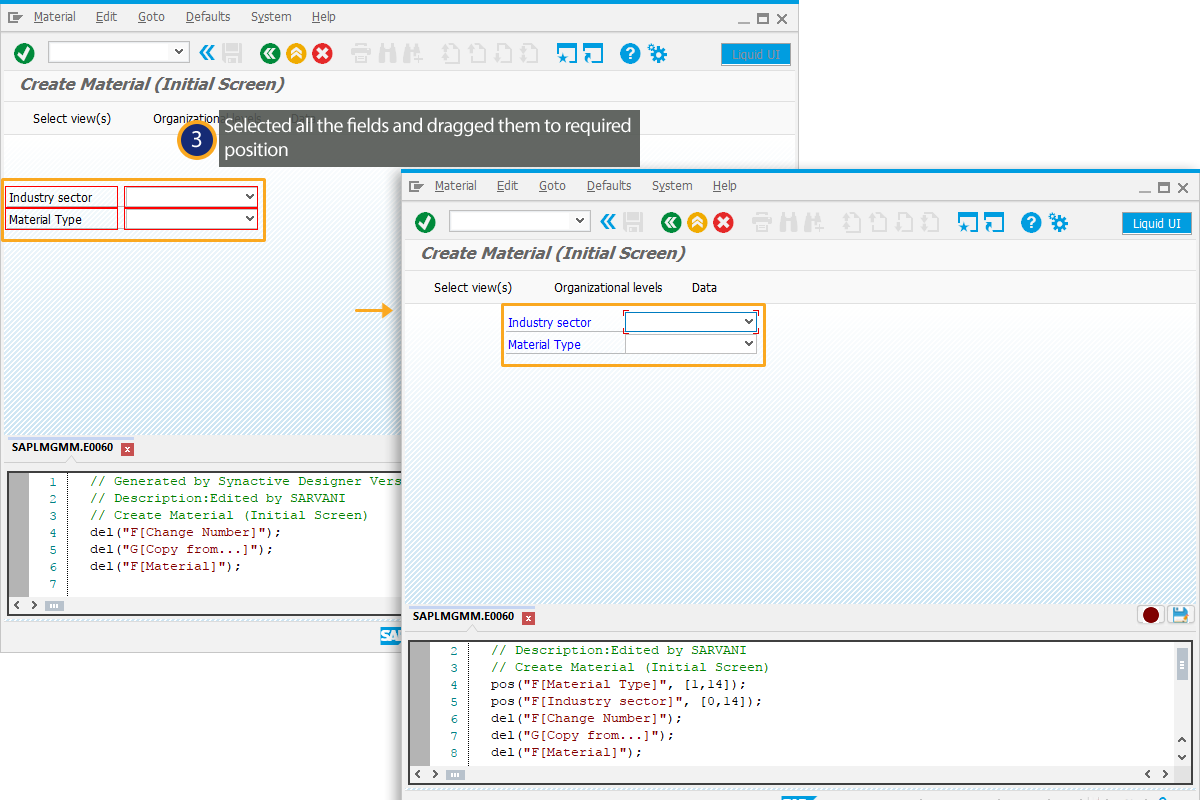
- Select Industry Sector and Material Type fields and drag them to the required position as shown below:
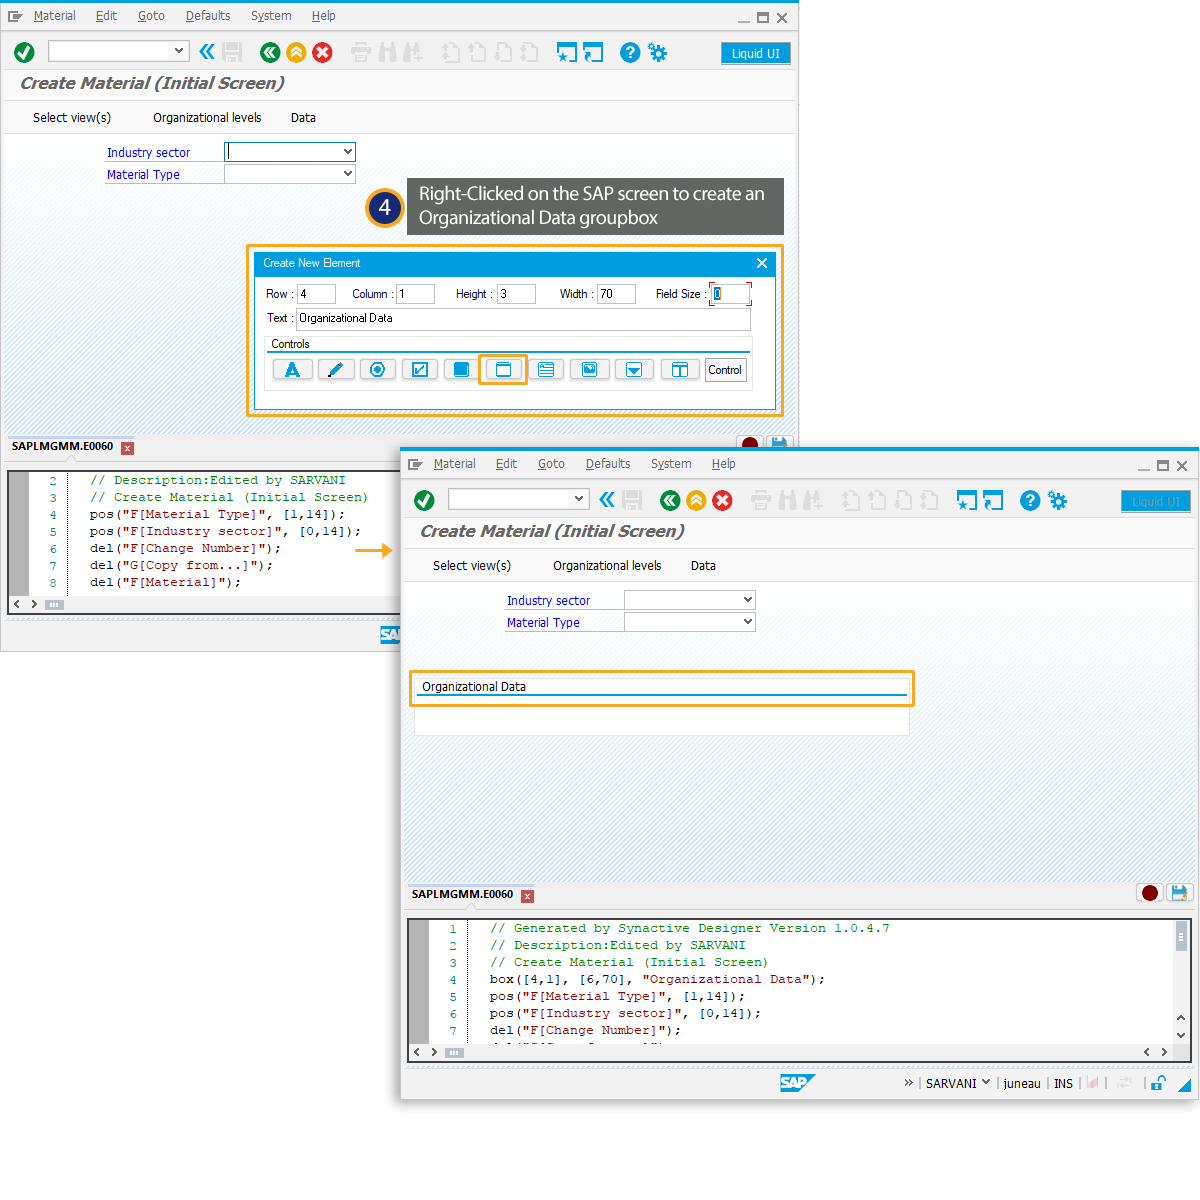
- Right Click on the SAP screen to create a groupbox(Organizational data).
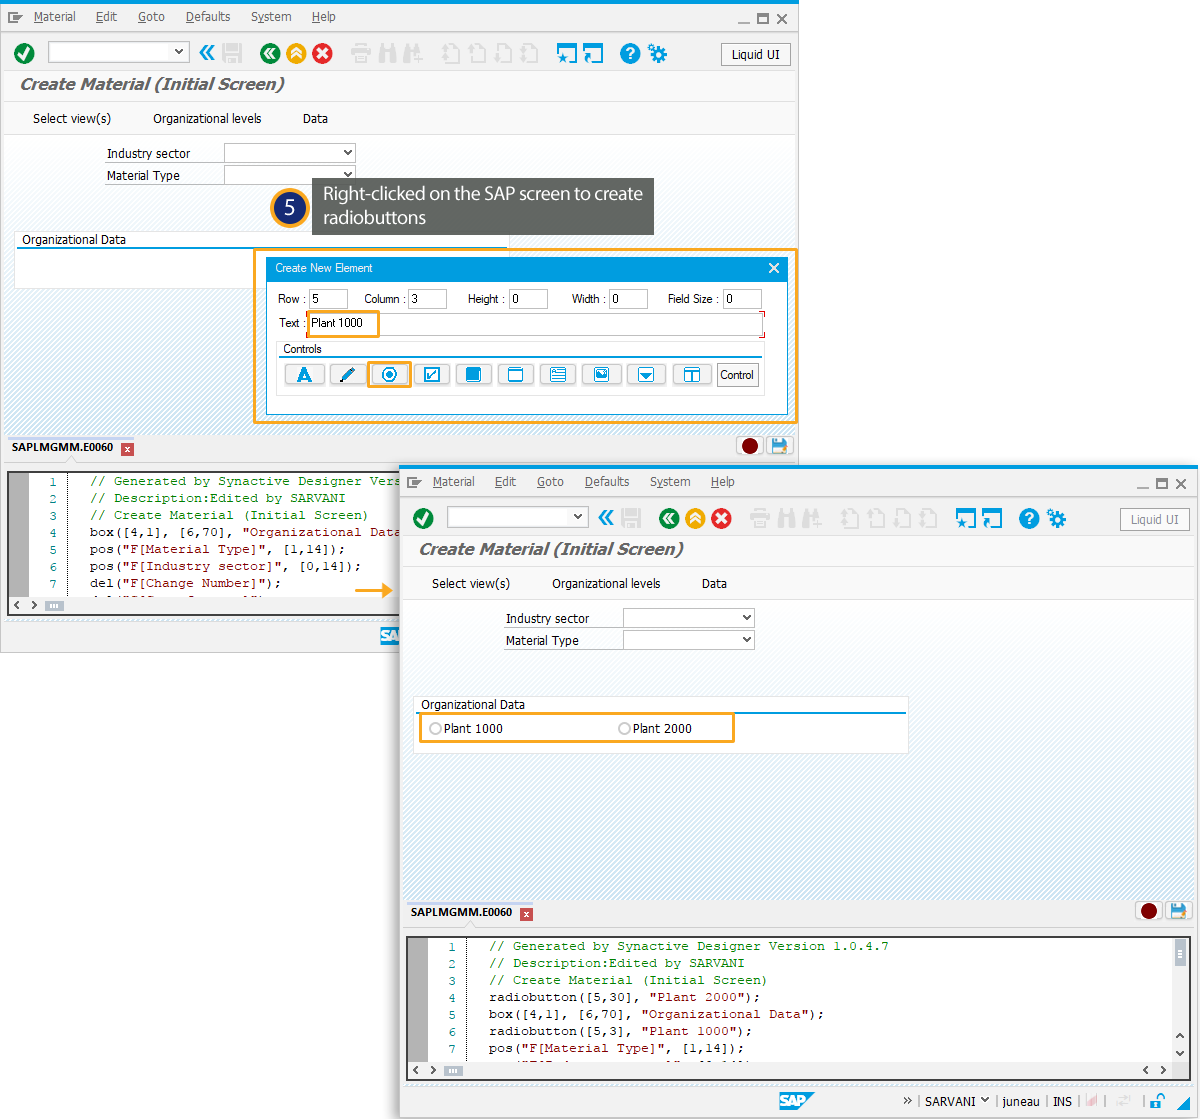
- Right Click on the groupbox to create a new Plant 1000 radiobutton. Similarly, you can create a new Plant 2000 radiobutton as shown below.
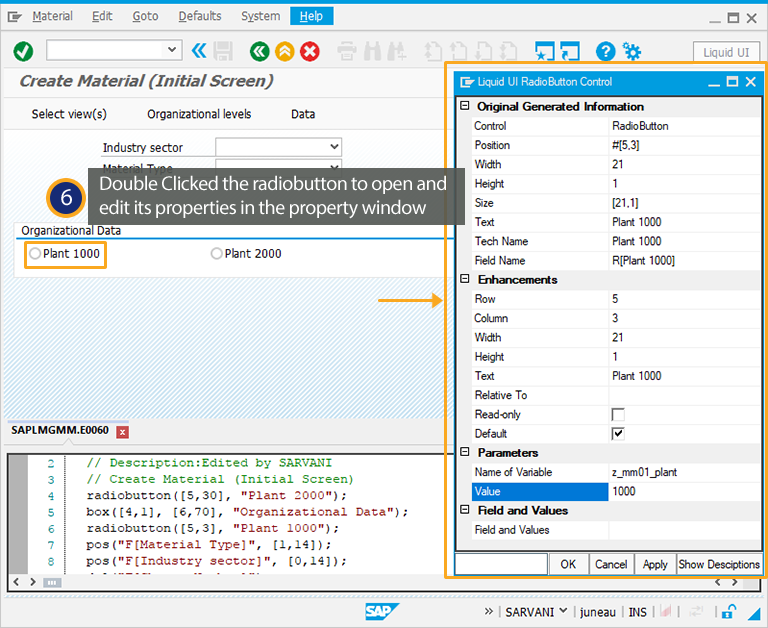
- Double Click on the Plant 1000 radiobutton to edit its property window
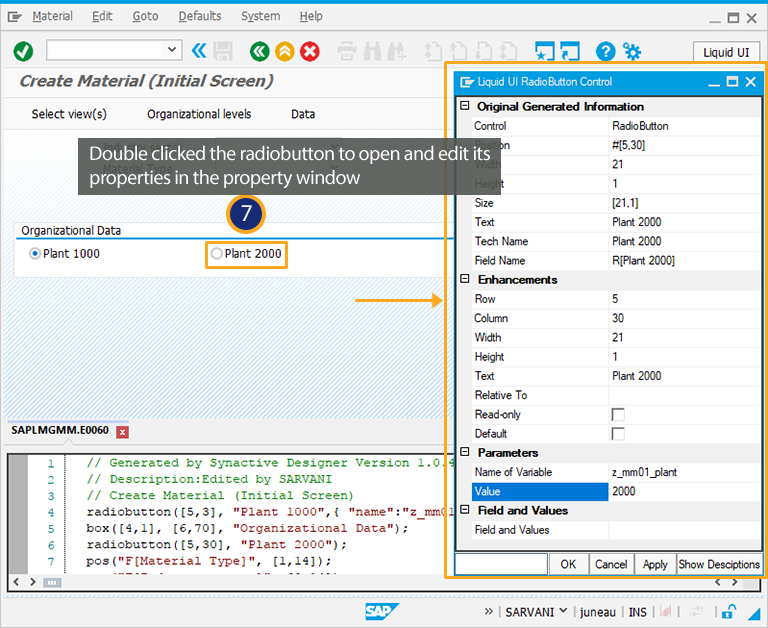
- Double Click on the Plant 2000 radiobutton to edit its property window.
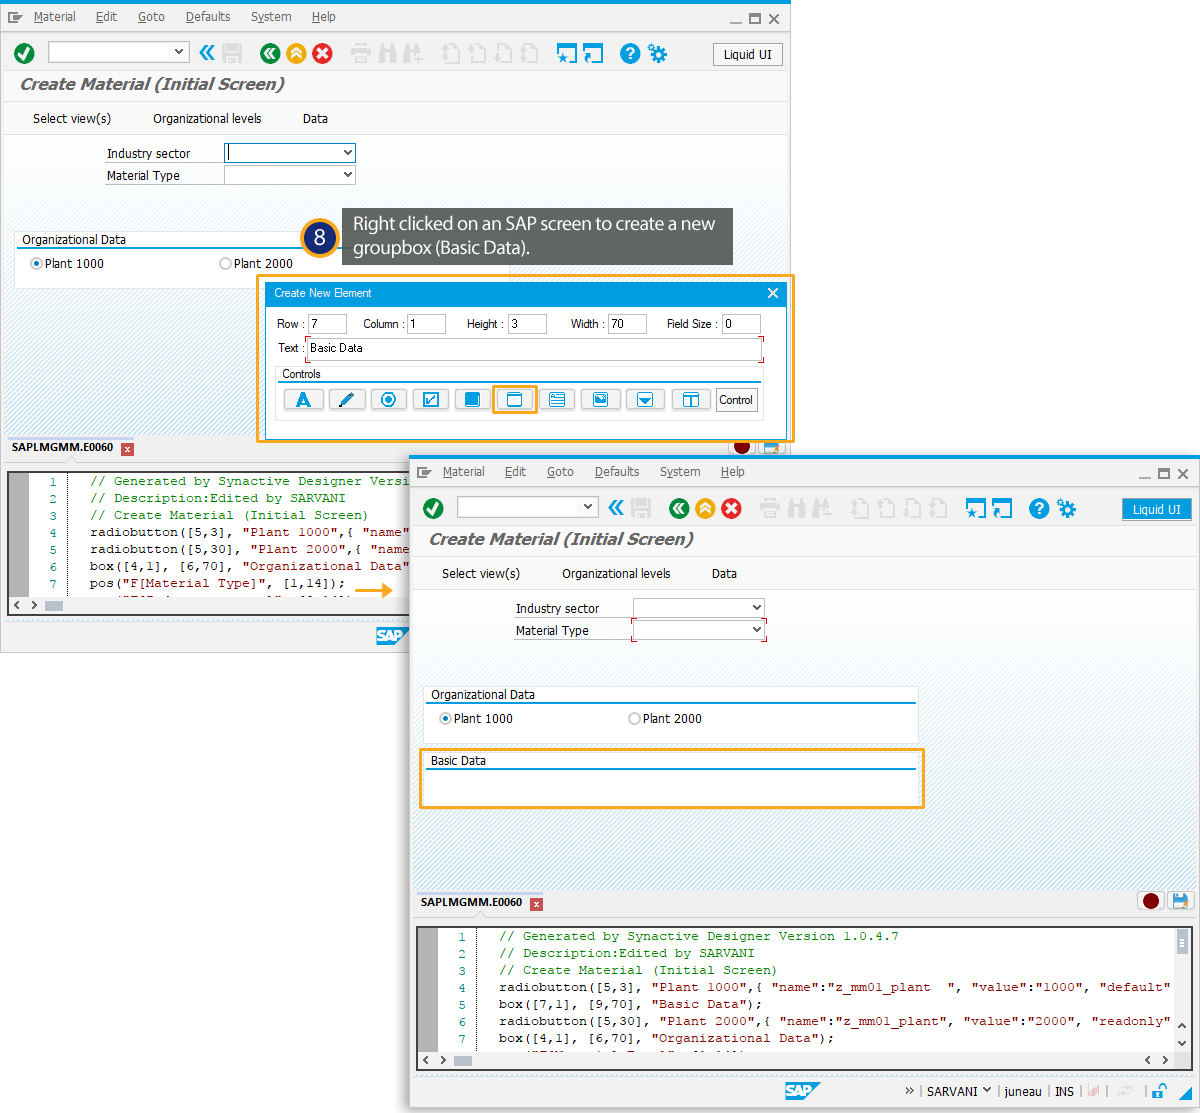
- Right Click on the SAP screen to create a new groupbox(Basic Data).
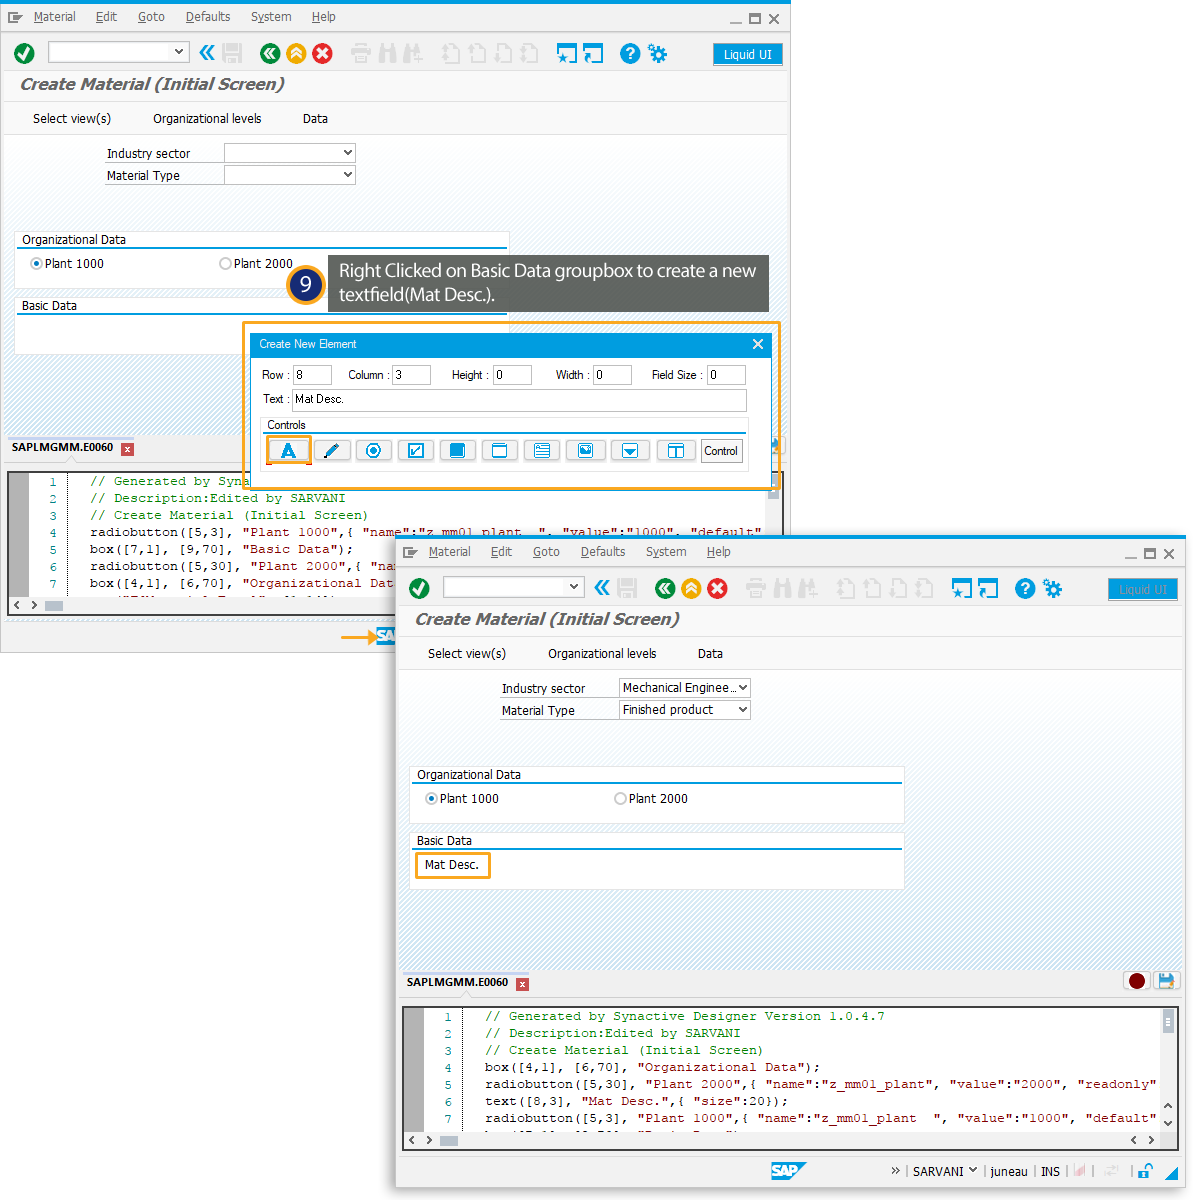
- Right Click on Basic Data groupbox to create a new textfield(Mat Desc.).
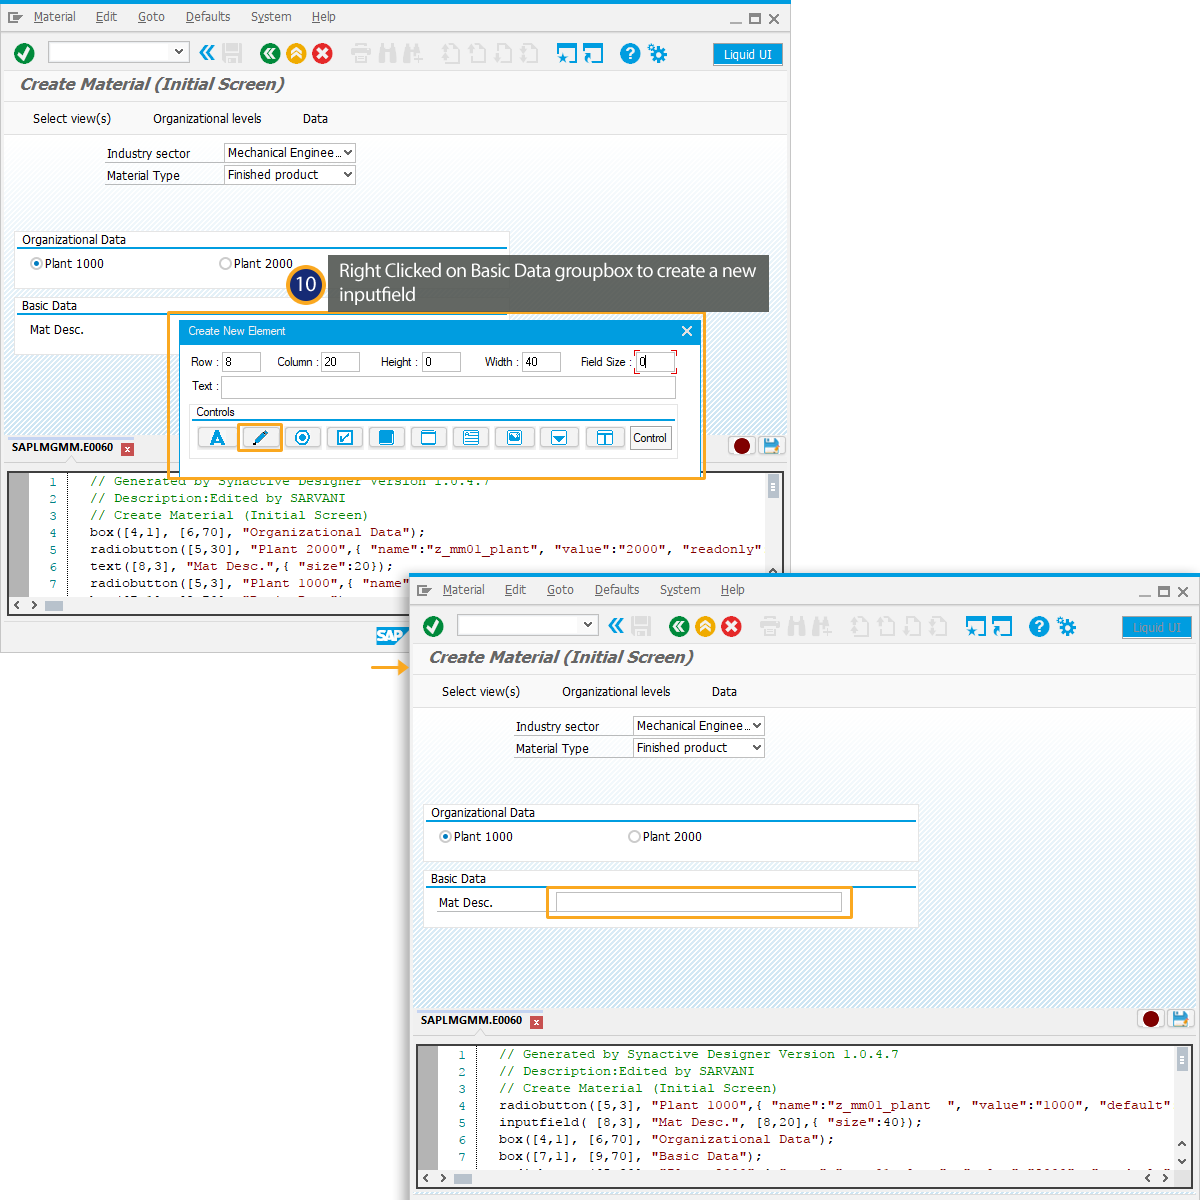
- Right Click on Basic Data groupbox to create a new inputfield.
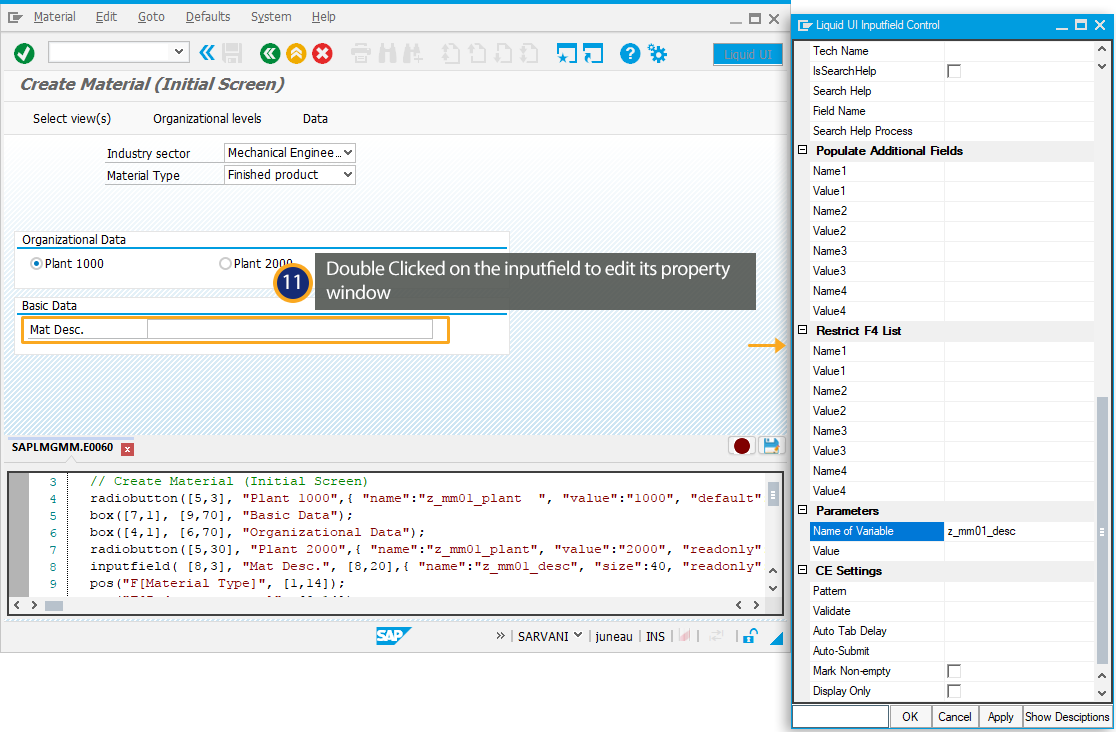
- Double Click on the inputfield to edit its property window.
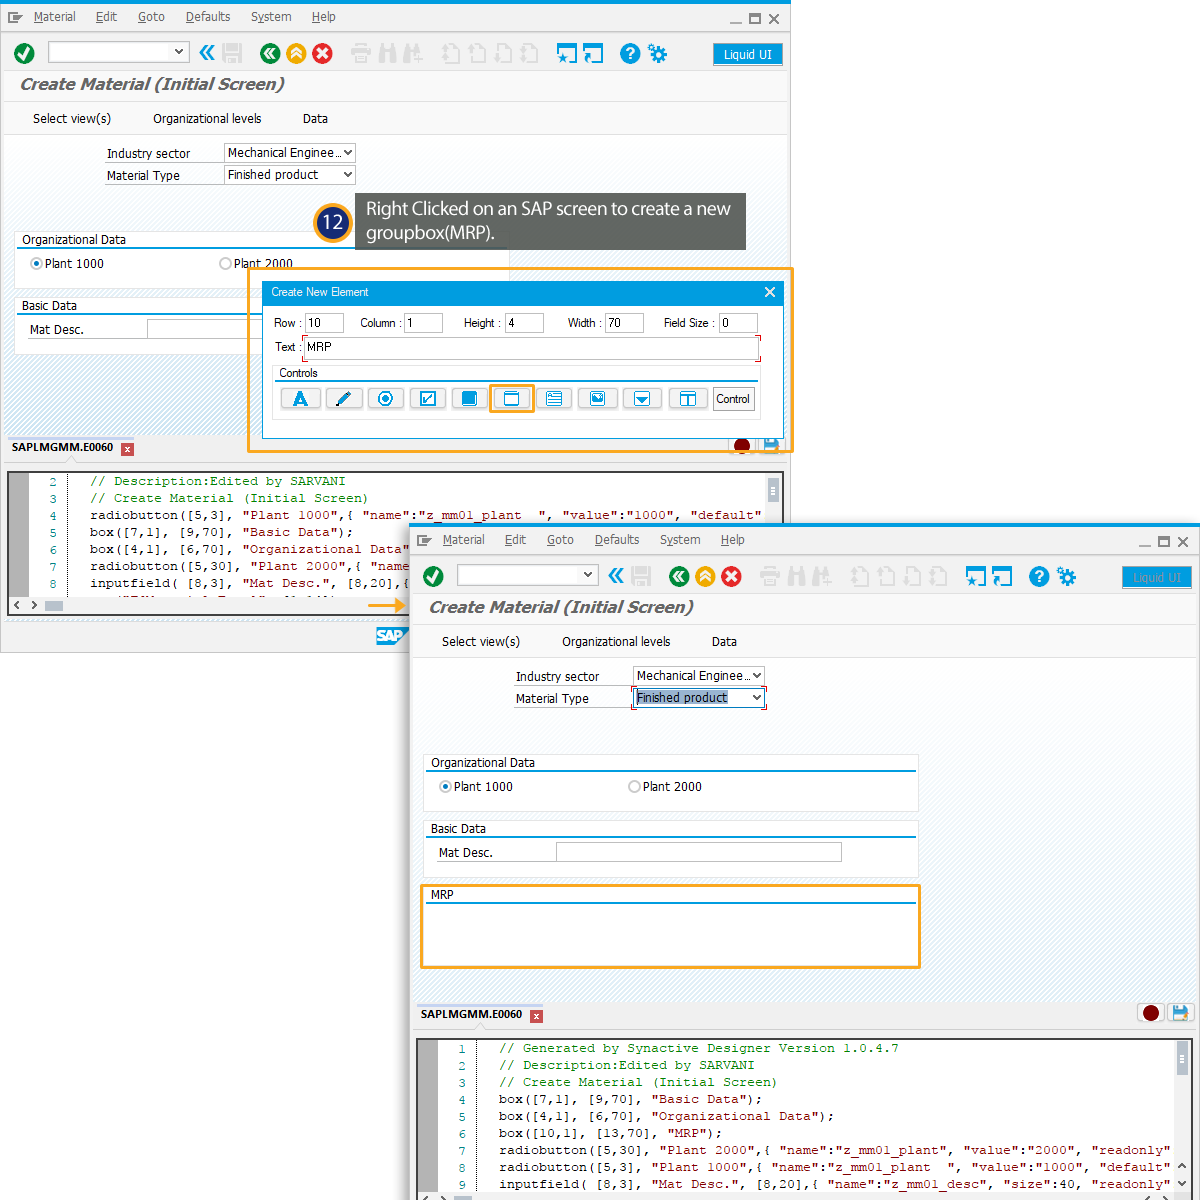
- Right Click on the SAP screen to create a new groupbox(MRP).
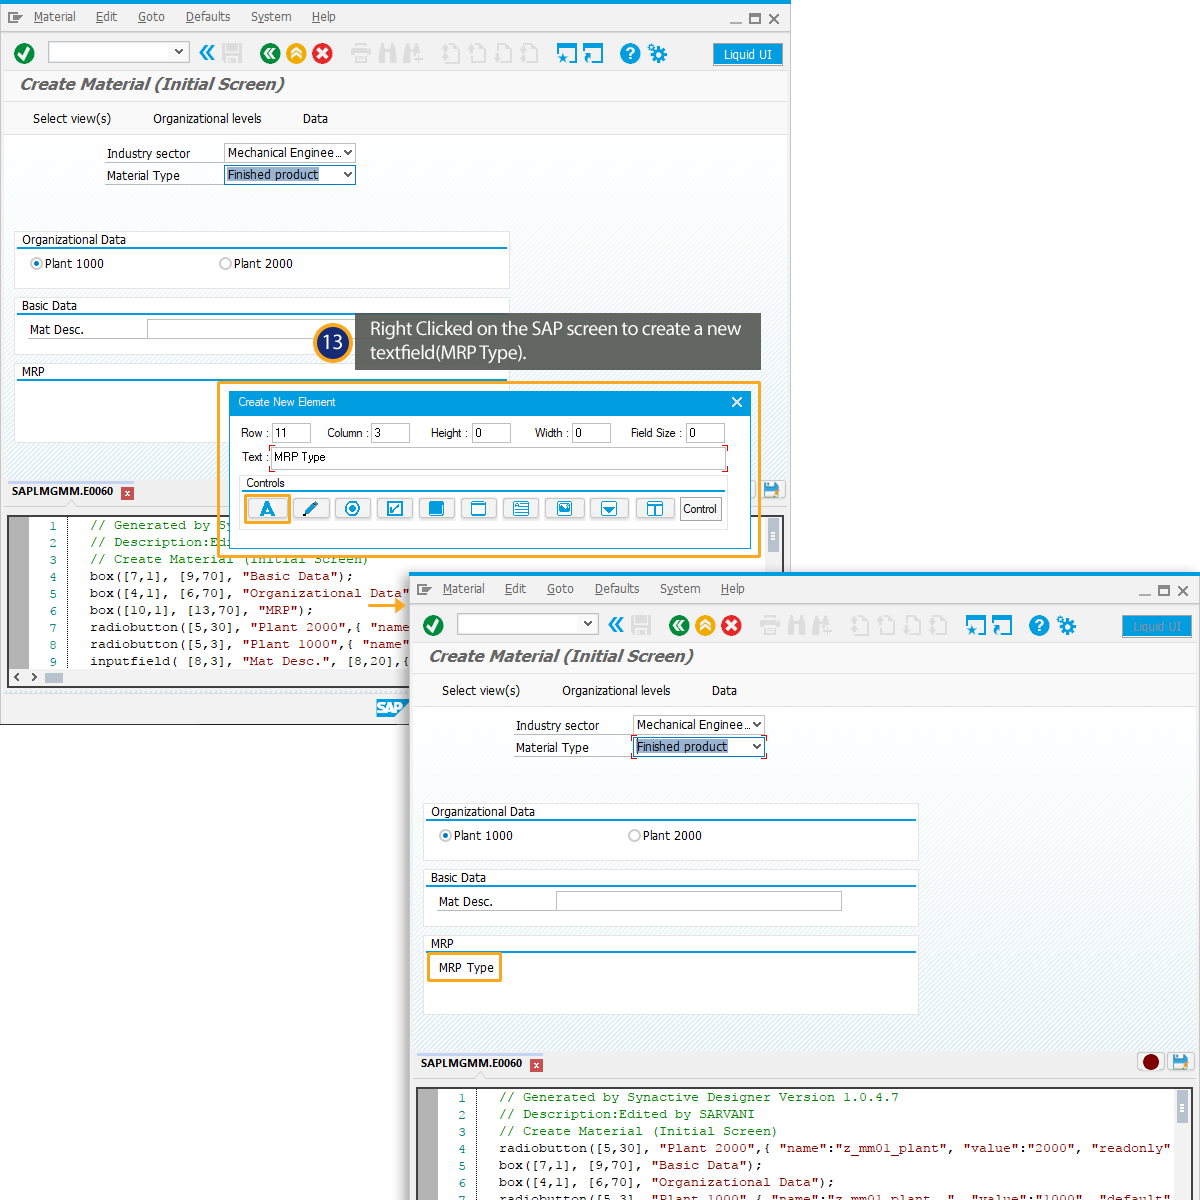
- Right Click on the SAP screen to create a new textfield(MRP Type).
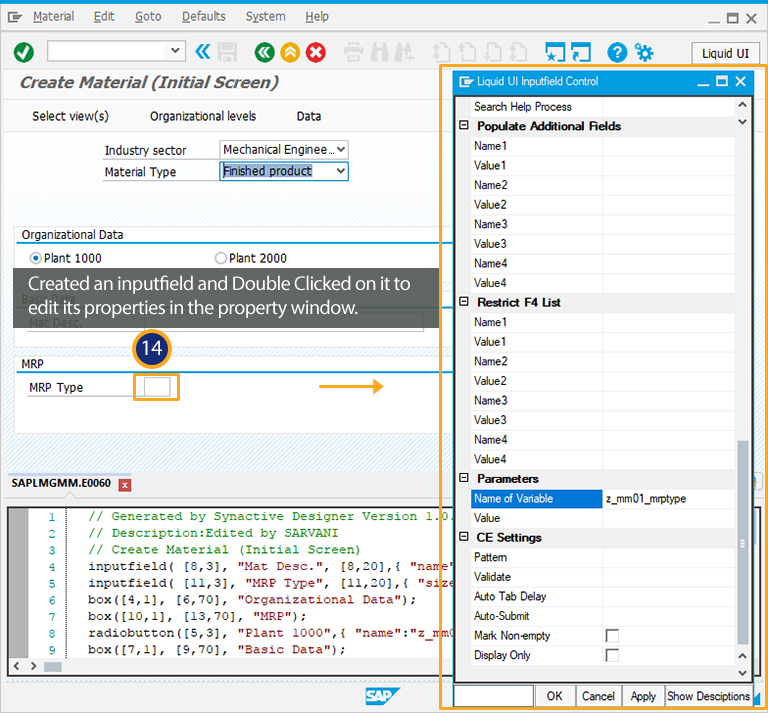
- Right Click on the SAP screen to create a new inputfield. Double Click on the inputfield to edit its properties in the property window.
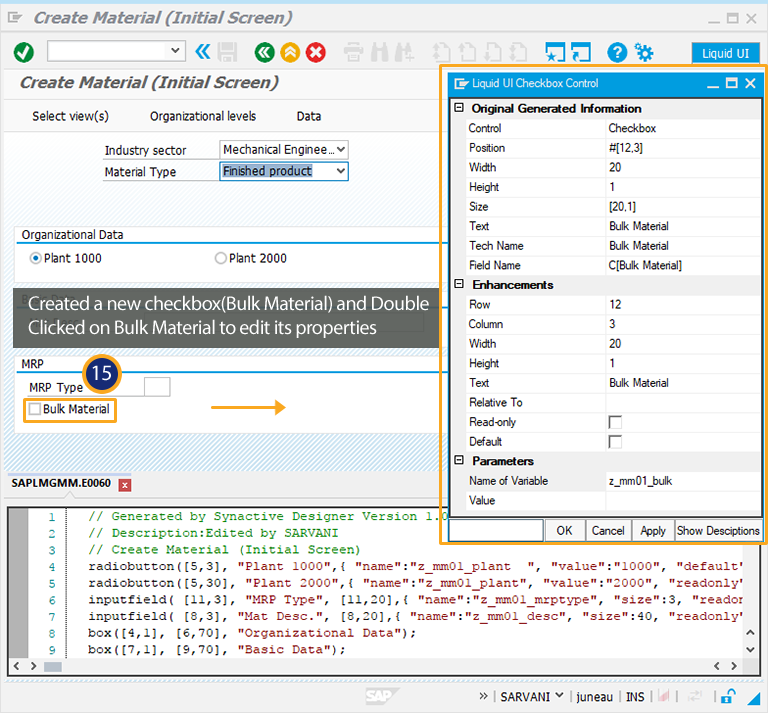
- Right Click on the SAP screen to create a new checkbox(Bulk Material). Double Click on Bulk Material to checkbox to edit its properties.
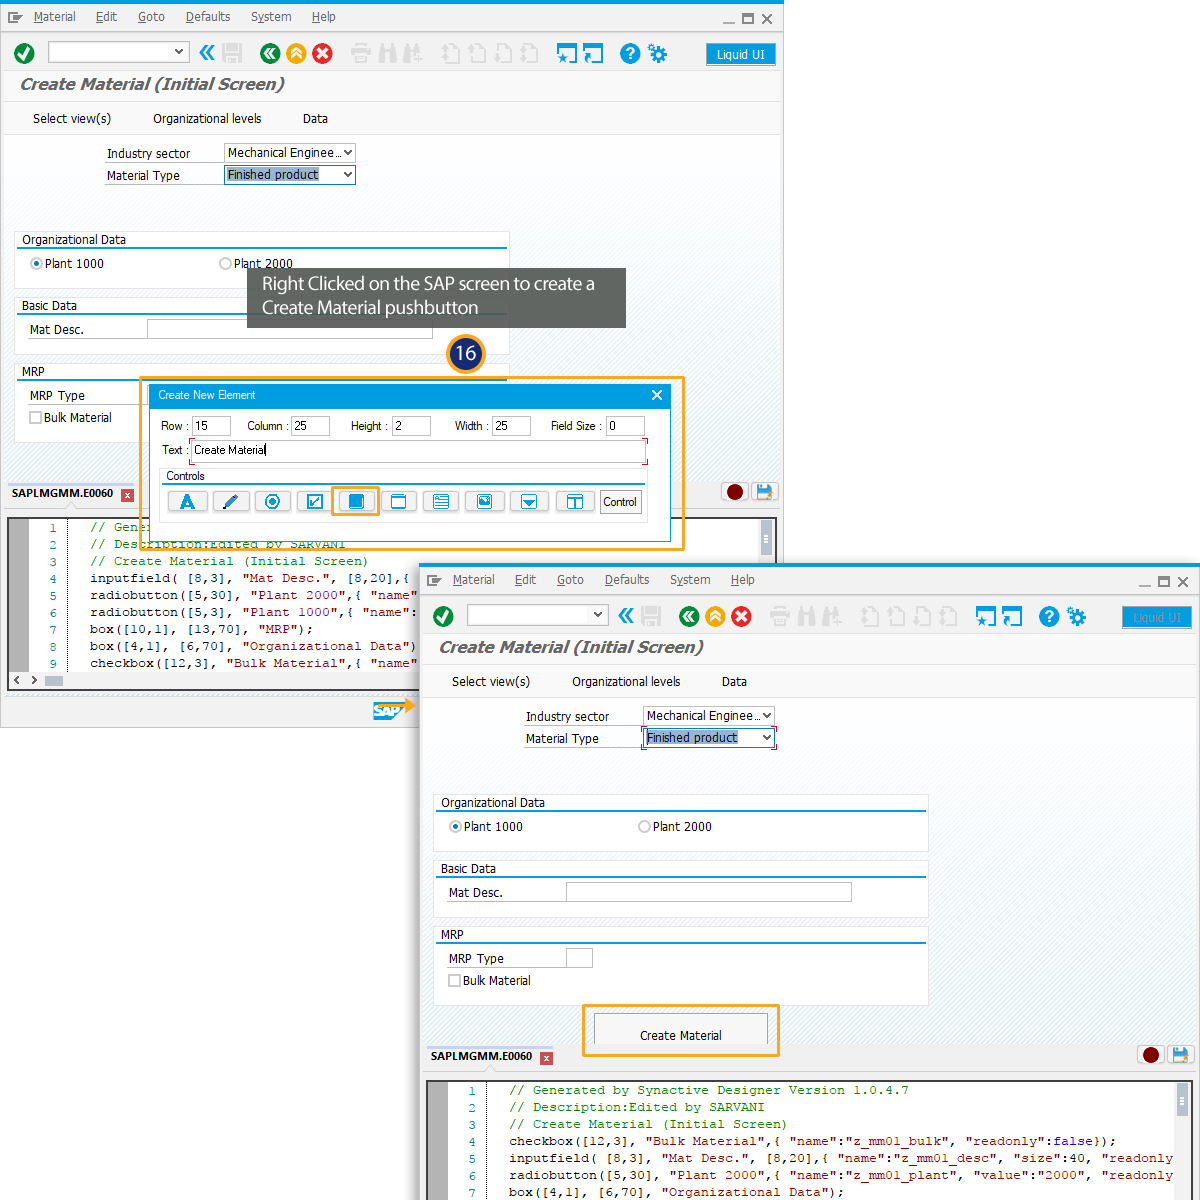
- Right Click on the SAP screen to create a Create Material pushbutton as shown below:
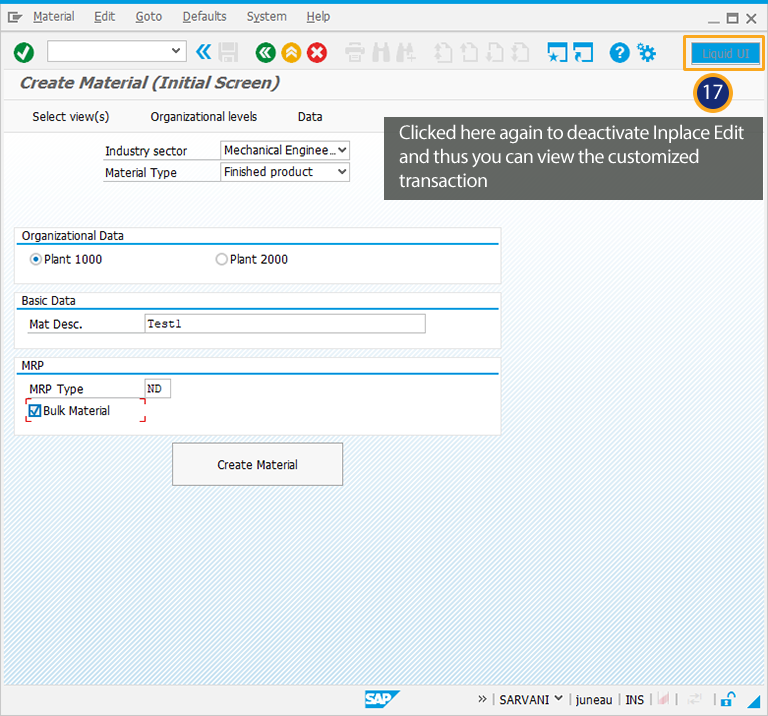
- Deactivate Inplace Edit and thus you can view the customized MM01 transaction as shown below.